In this tutorial we will use JSON2Video API and Make.com to create a small no-code application that turns text into a video with AI. You can create your own videos with this text to video API.
The application will use Airtable as a database to store the prompt text, Make.com to automate the process and JSON2Video API to generate the videos.
Choosing the AI models
JSON2Video API integrates with different AI services to generate images and voices like Flux-Pro, Freepik, ElevenLabs, Azure TTS, etc.
In this tutorial we will use Freepik's classic model to generate images and Microsoft Azure TTS to generate voices. We choose these services because they are included in the JSON2Video API plan and do not consume extra credits from your account.
Read more about the credits consumption here: How credits are consumed.
Example of a video generated in this tutorial
| Text to video prompt | Resulting video |
|---|---|
|
Create a video about skiing in Colorado. Additional settings:
|
|
Create the Text to Video app
Step 1: Create an Airtable base
First we need to create an Airtable base to manage the list of videos to generate. You can clone the following base and then edit it to manage your own list of videos:
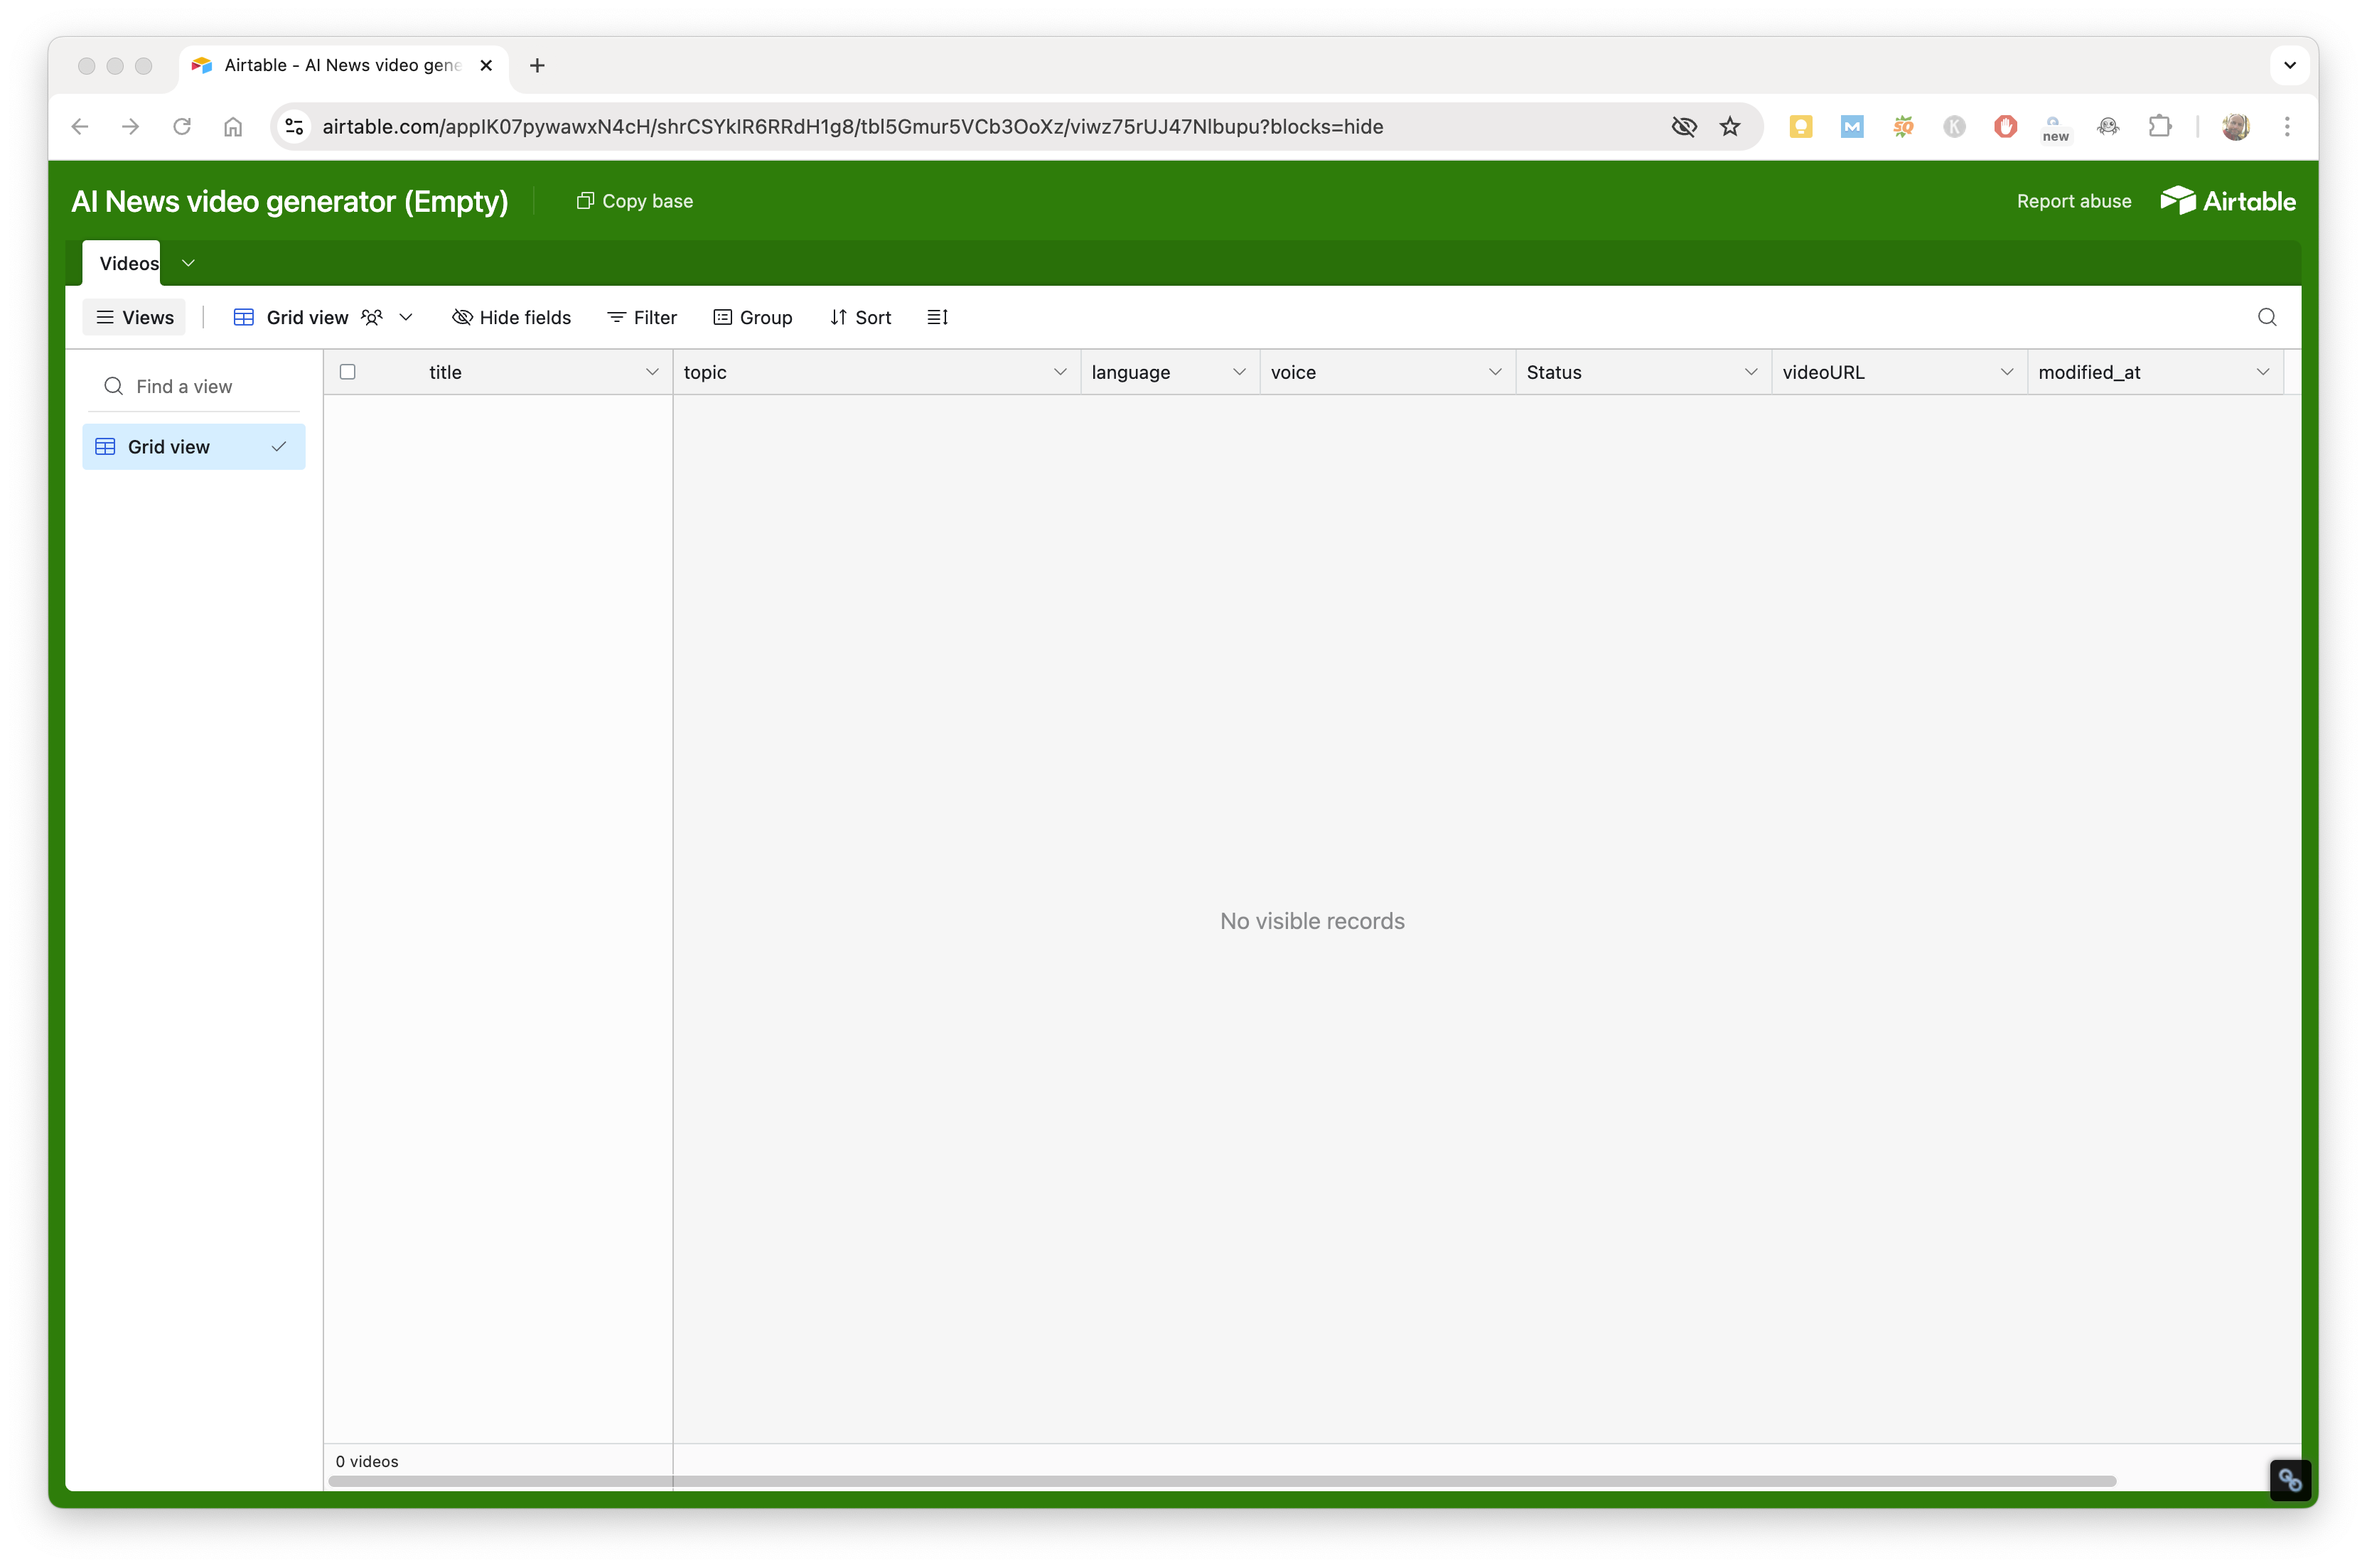
Clone the Text to video Airtable base
Step 2: Create the Make.com scenario
Now we need to create the Make.com scenario that will be used to generate the videos.
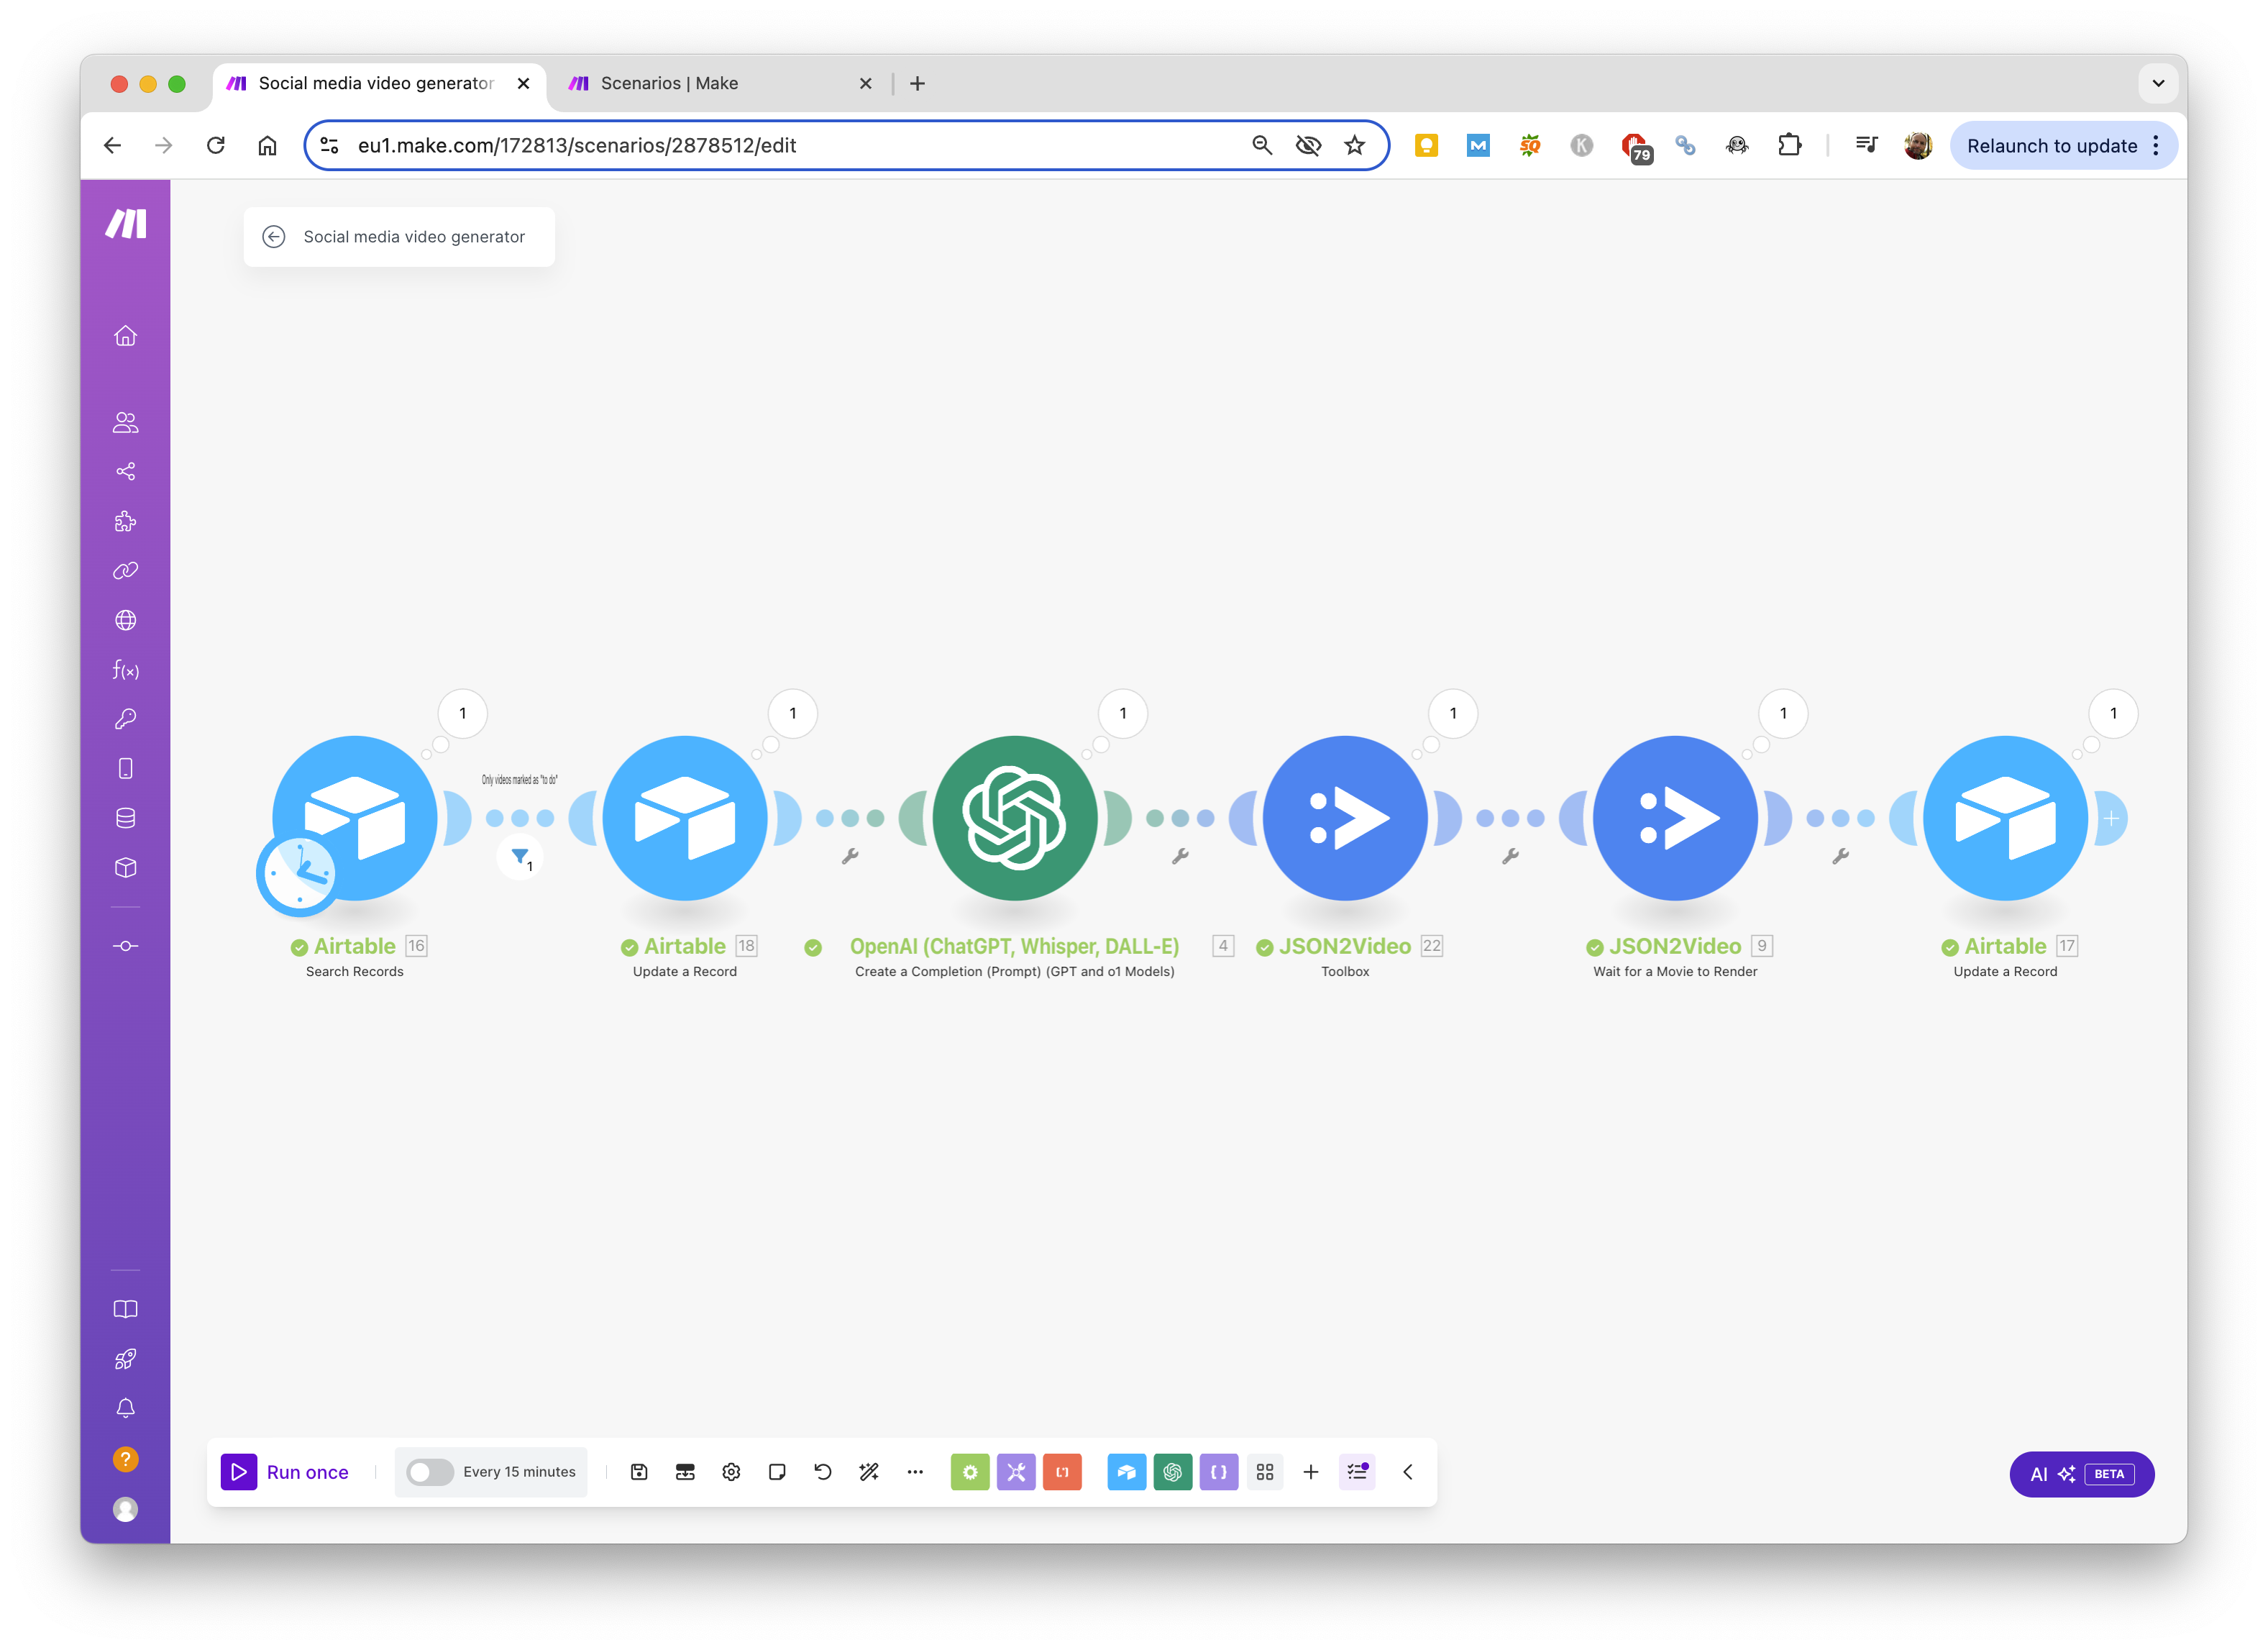
Download the scenario blueprint
Once you have downloaded the blueprint, you can import it into a new scenario in your Make.com account.
Step 3: Configure the connections
Now we need to configure the connections to your Airtable account and JSON2Video API:
- Airtable: Read Airtable integration guide to learn how to connect your Airtable account to Make.com.
- JSON2Video: Watch JSON2Video getting started video to learn how to connect your JSON2Video account to Make.com.
Generate your first video from text
Once you have configured the connections, you can start generating videos:
Step 1: Add a new record to the Airtable base
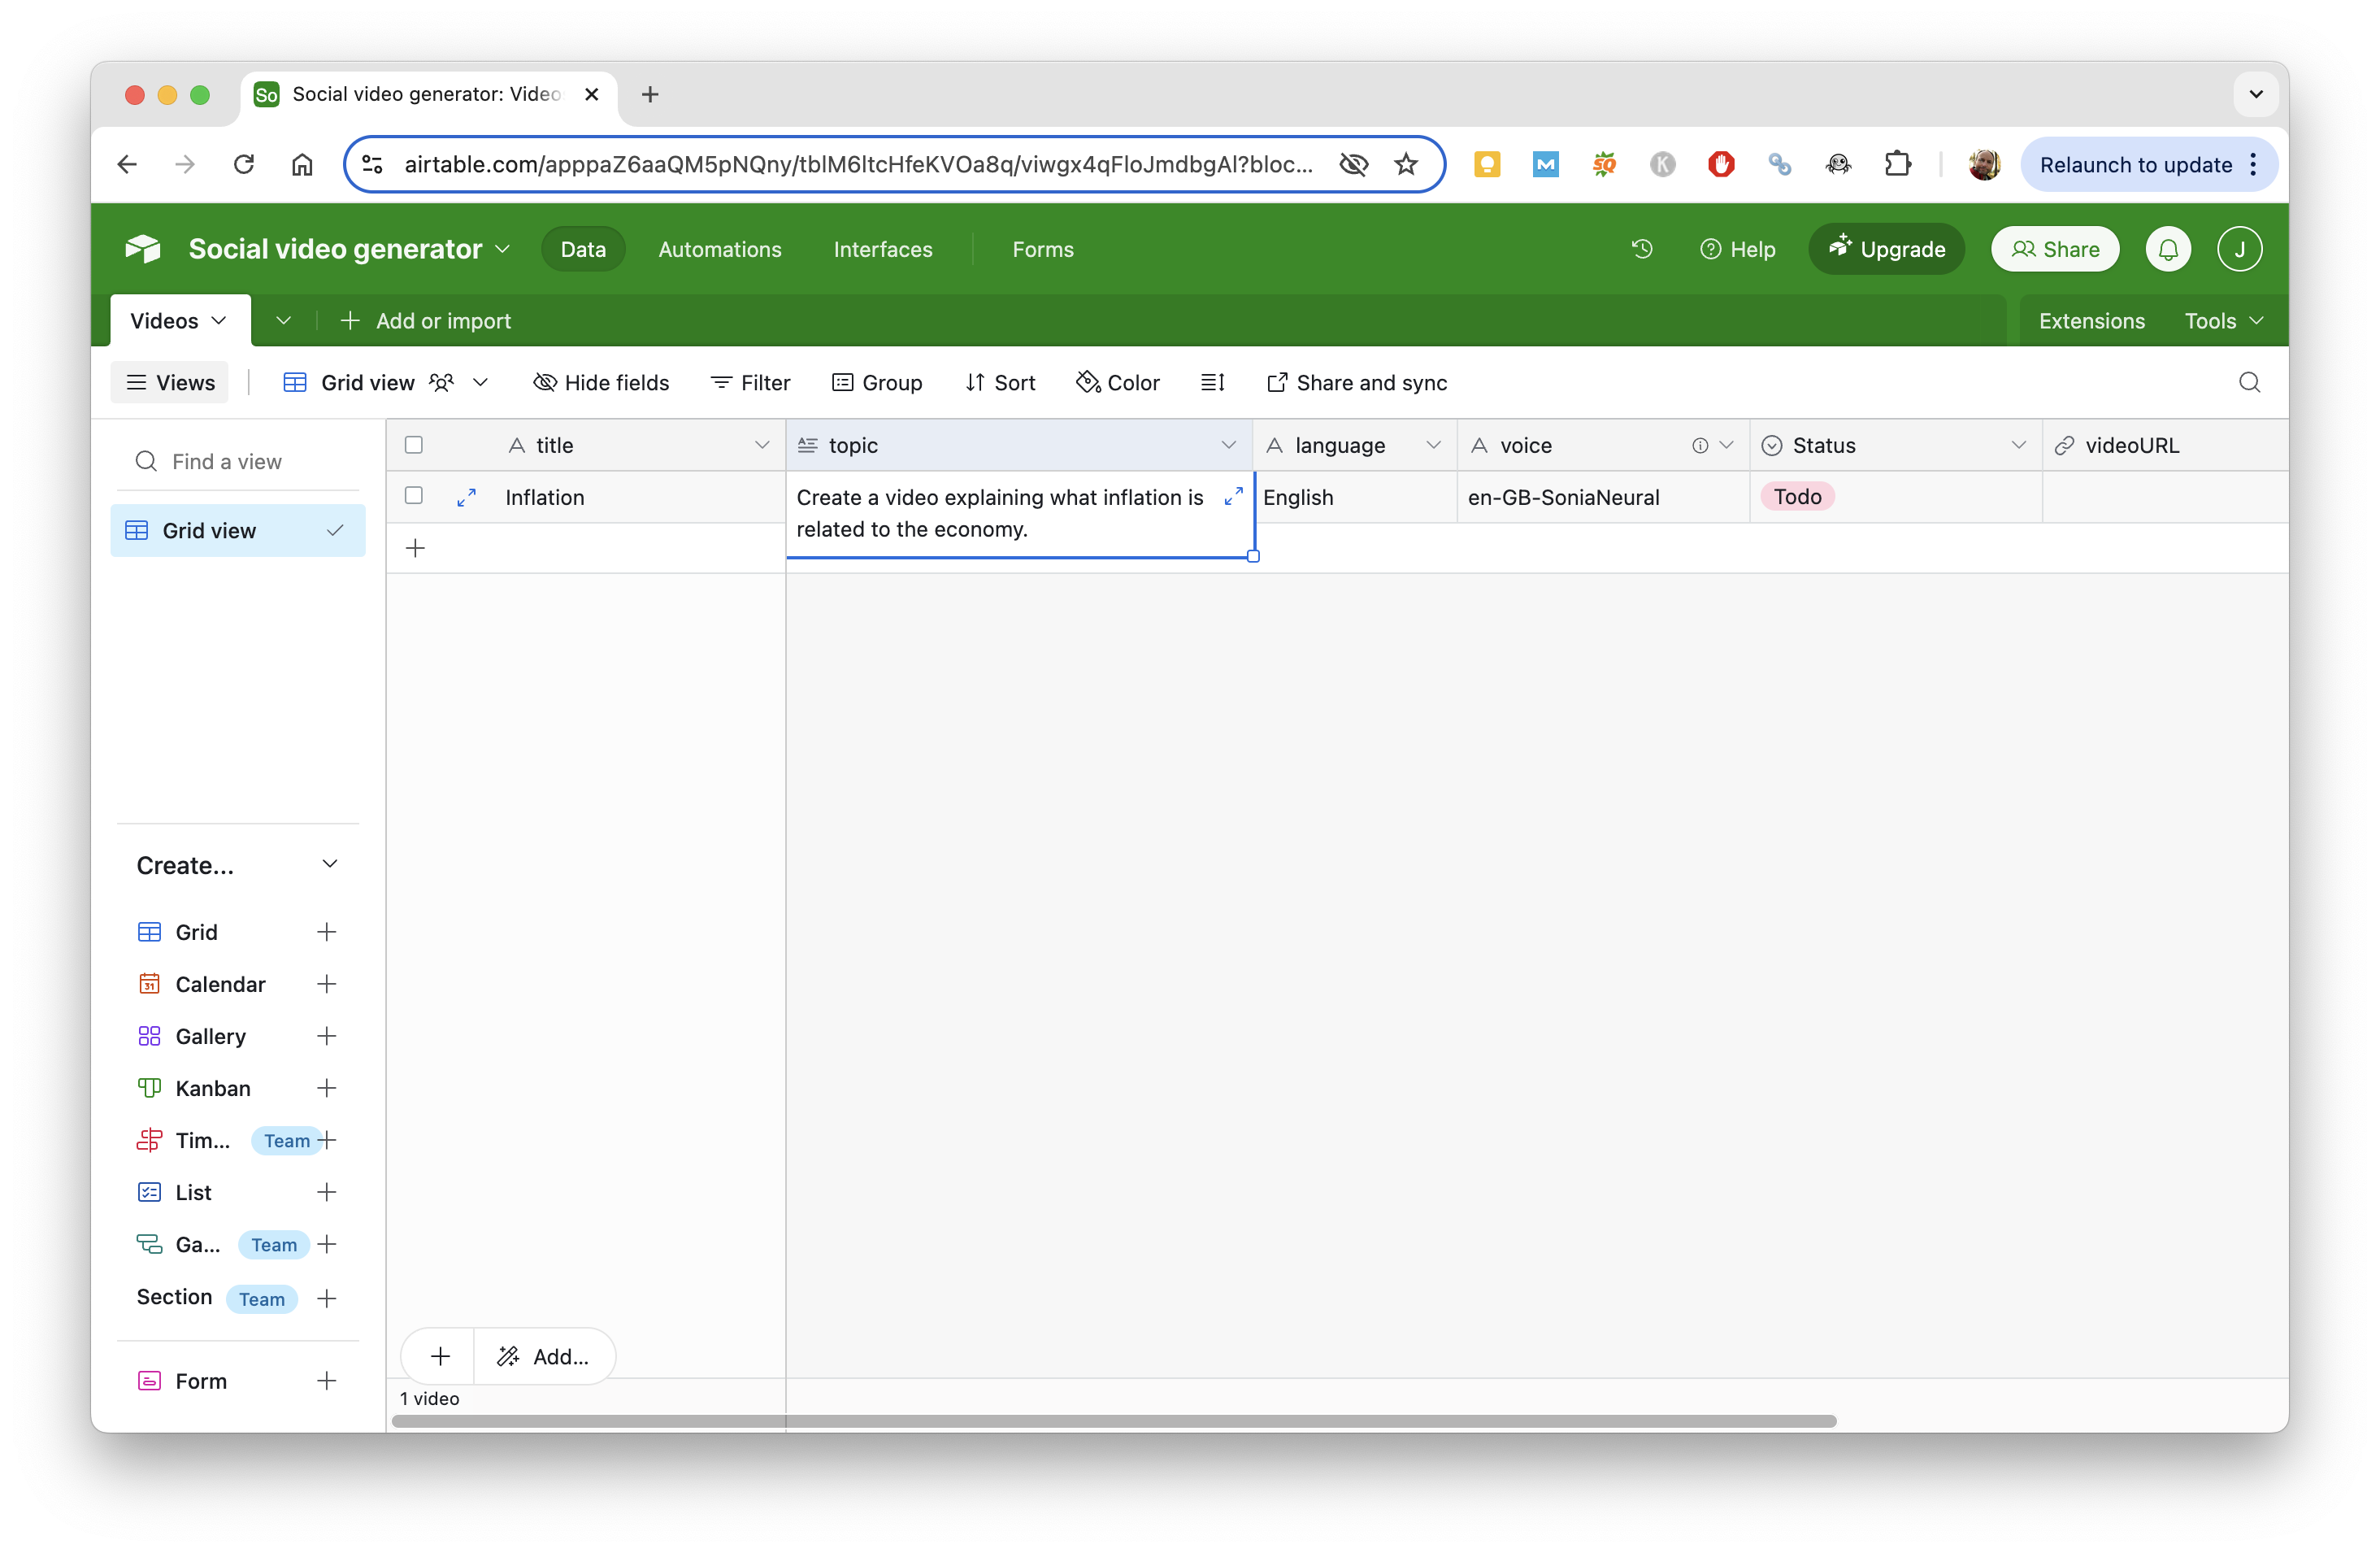
- In the Title field, add a title for your video. It's for your own reference, it will not be used by the video generation process.
- In the Topic field, add the topic of the video you want to generate (see the examples below).
- In the Language field, select the language of the video you want to generate. Not all languages are supported, but you can try with the most common ones like English, French, Spanish, Italian, German, etc.
- In the Voice field, select the voice of the video you want to generate. Choose a voice from Azure's TTS voices that matches the language of the video. For example, if the language is English, you can choose a voice like en-US-AriaNeural.
- Finally, change the Status field to To do.
Step 2: Run the scenario in Make.com
Run the scenario in Make.com by clicking on the Run button.
The scenario will take a few minutes to complete. If everything goes well, the scenario will run until the end and the video will be generated.
If the scenario fails, check the Solving issues section at the end of this page.
Step 3: Check the Airtable base
Check now the Airtable base, and the Status field should have been changed to Done and the VideoURL field should have been populated with the video URL.
Examples
Here are some examples of videos generated with the text to video app:
| Prompt | Video |
|---|---|
|
10 Kitchen Hacks That Will Change the Way You Cook: Innovative tips to simplify cooking and food preparation. |
|
|
Cleopatra Lived Closer to the Moon Landing Than the Pyramids: A mind-blowing perspective on historical timelines |
|
|
How Rich People Avoid Taxes (Legally): Explaining strategies like trusts, deductions, and loopholes. |
|
How the app works
Let's dive into the details of the Make scenario and how it works.
- The scenario starts by checking the Airtable base to see if there are any records with the Status field set to To do.
- If there are records to process, the scenario will take the first record, update the Status field to In progress.
-
Then the scenario calls "ChatGPT" to generate the script for the video.
The prompt given to ChatGPT is:
Create a script of a social media video about the topic included below. The video will be organized in scenes. Each scene has a voice over and an image. The voice over text must be at least 20 words. There should be not more than 4 scenes. Your response must be in JSON format following this schema: { "scenes": [{ "voiceOverText": "", "imagePrompt": "" }] } The image prompt must be written in ENGLISH, being detailed and photo realistic. In the image prompt, you MUST AVOID describing any situation in the image that can be considered unappropriate (violence, disgusting, gore, sex, nudity, NSFW, etc) as it may be rejected by the AI service. The voiceOverText must be in {{16.language}}. The topic of the video is: - ChatGPT returns a JSON object with the script for the video, including the voice over text and image prompt for each scene.
- The scenario then calls the JSON2Video module "Toolbox" with the tool Social media reel (free). If you want to customize the template behind this tool, you can duplicate the Social media reel (free) template and modify it to your needs.
- Next module is "Wait for a Movie to Render". This module will wait until the video is generated by the JSON2Video API.
- Finally, the scenario updates the Airtable base with the video URL and the status of the record.
Understanding the video template
The template used in this example defines the design of the output video and the variables that will be replaced by the JSON2Video API.
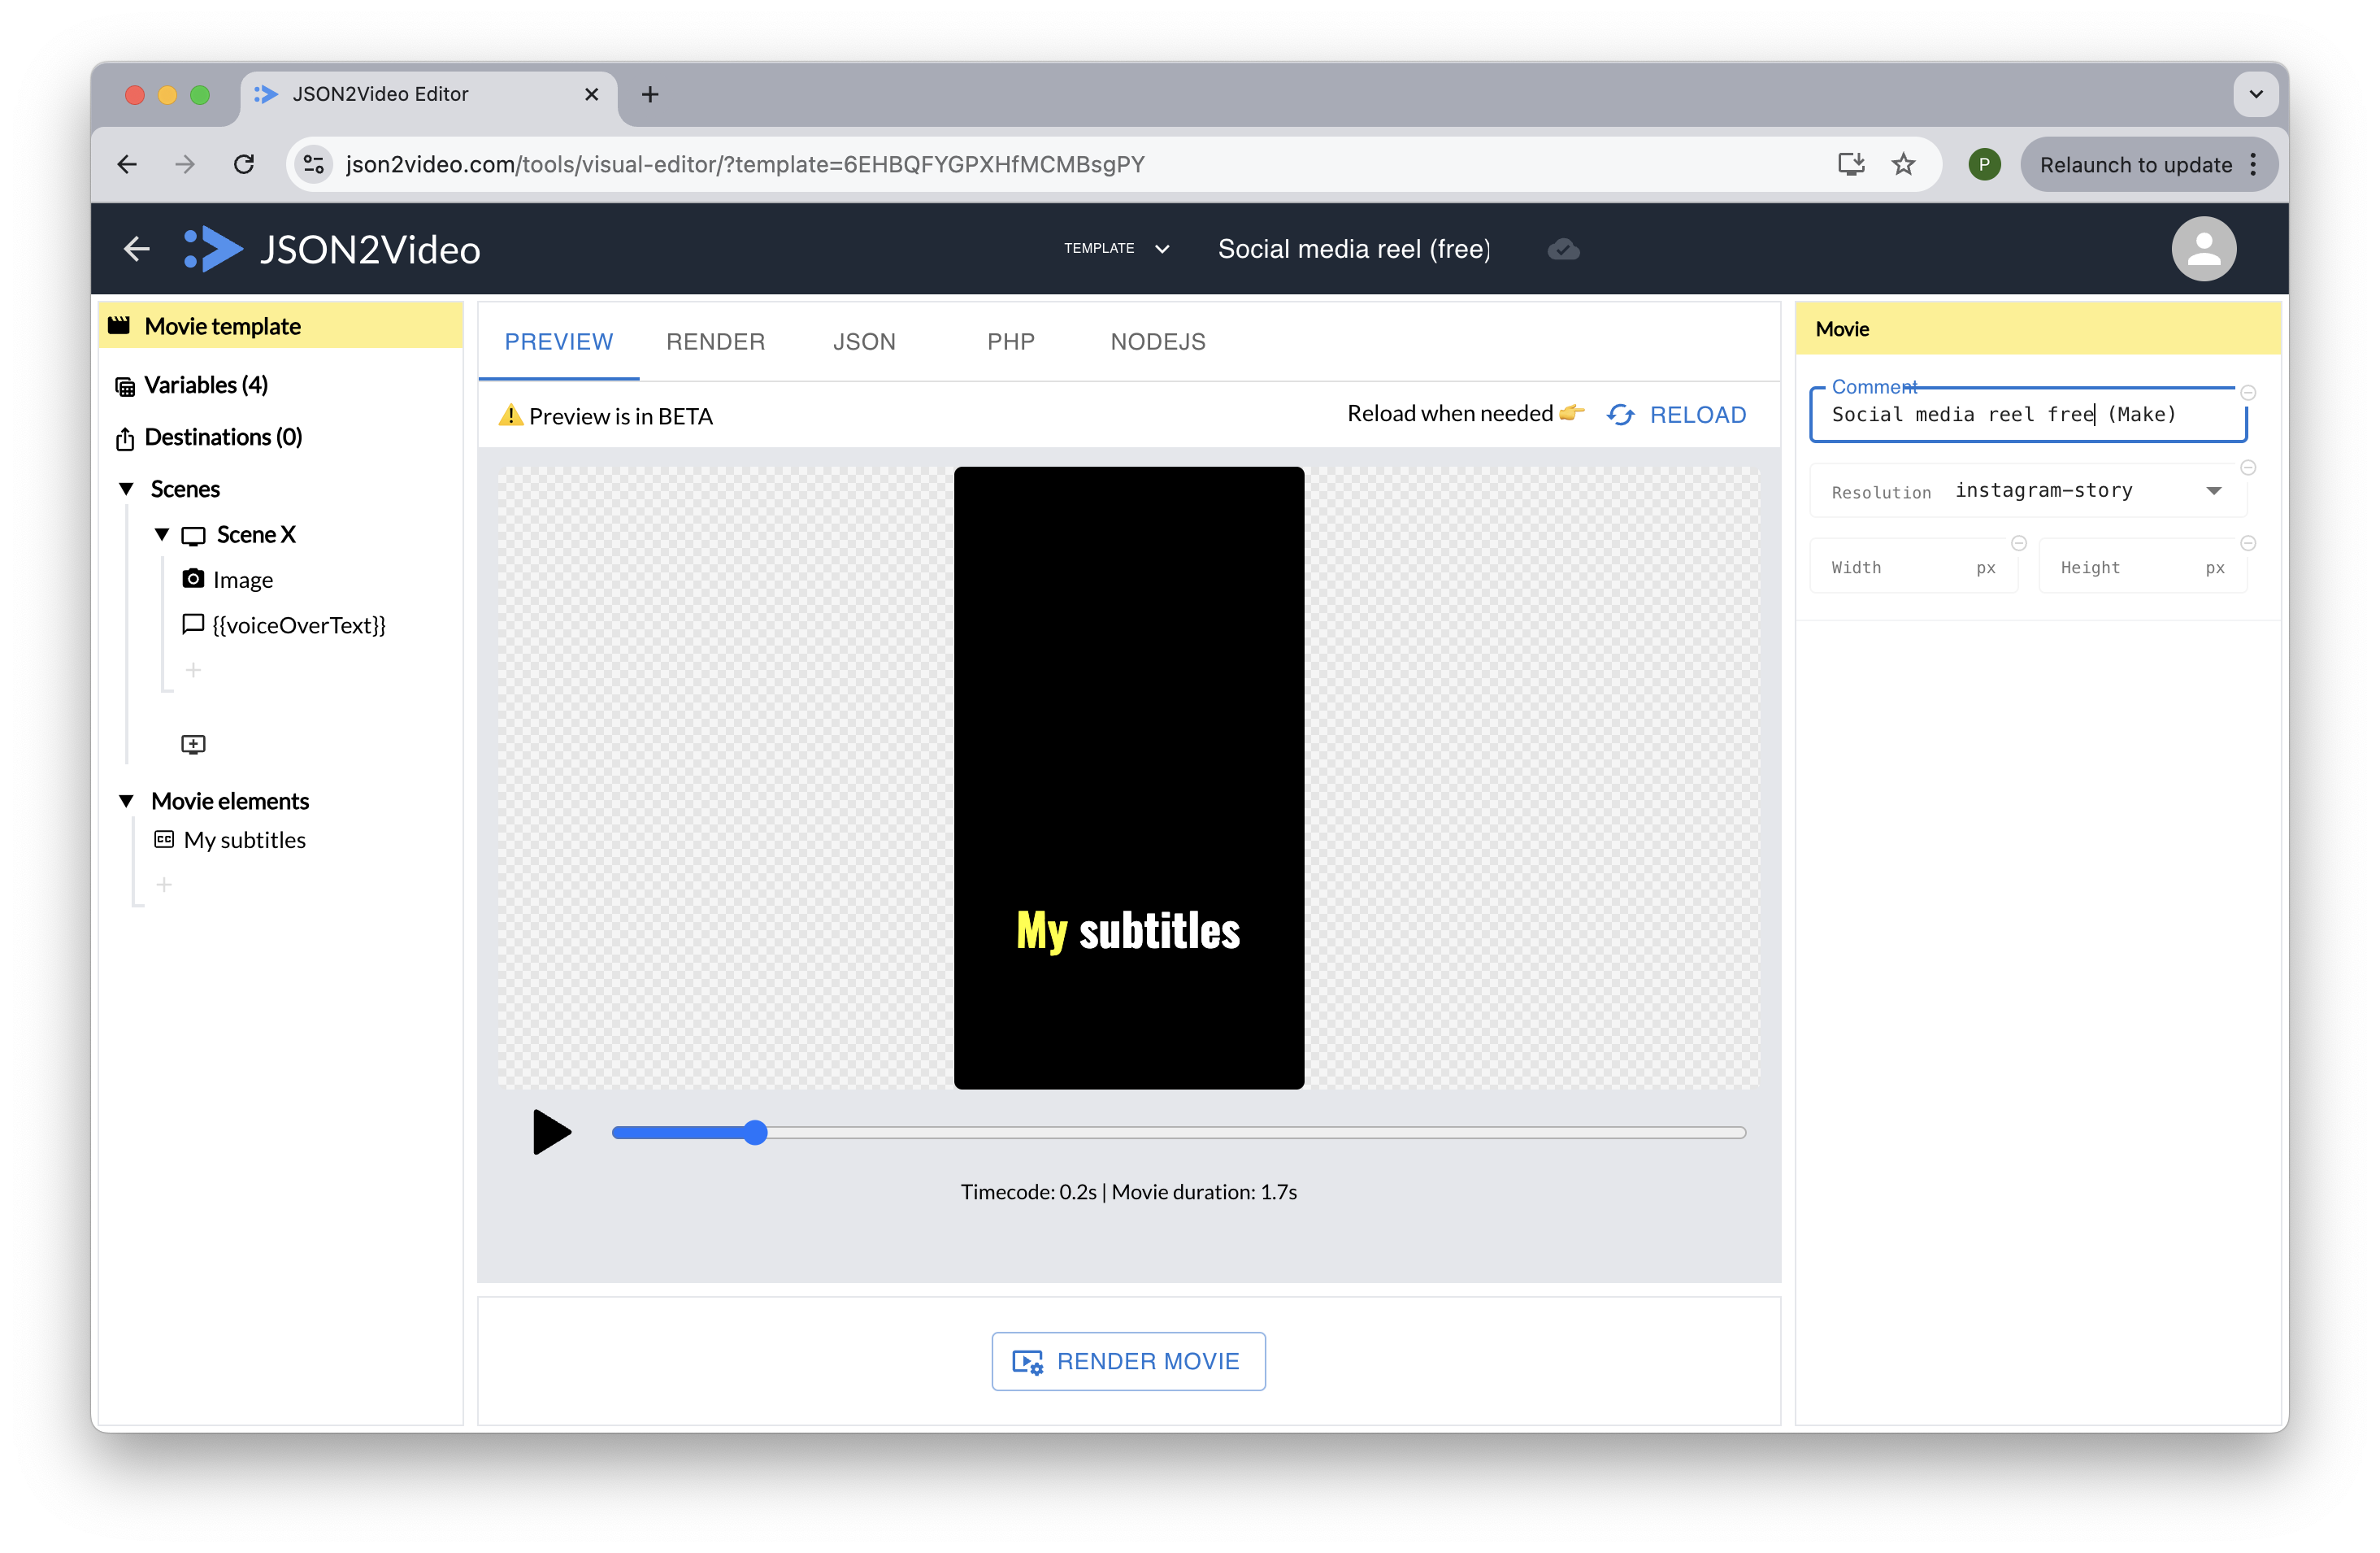
The template defines a vertical video, with a replicable scene that has a background image and a voice over.
The template receives 4 variables:
- scenes: an array of objects, each object representing a scene of the video, with 3 fields: overlaidText, voiceOverText and imagePrompt.
- voice: the voice name of the voice over
- voiceModel: the voice model to use for the voice over (by default
azure) - imageModel: the image model to use for the background image (by default
freepik-classic)
The scene (using the iterate property) will be populated for each item in the scenes array, creating a video with as many scenes as the scenes array has items.
Learn more about building and customizing video templates in the video templates documentation.
Using other AI models
You can use other AI models by entering the model name in the Voice Model and Image Model fields in the module Toolbox settings.
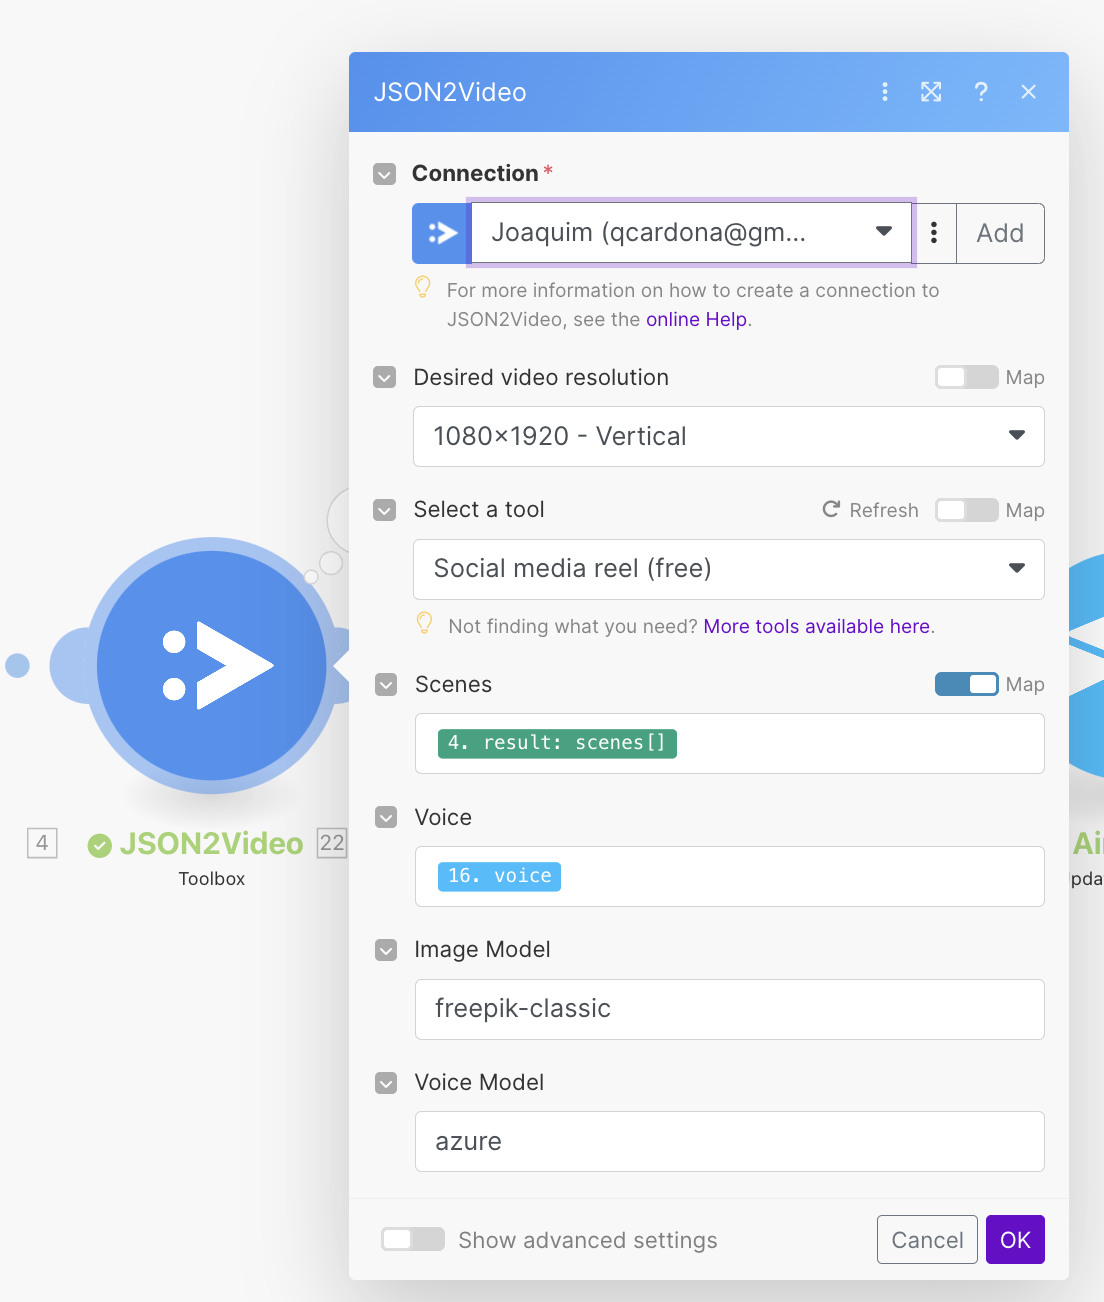
By default, the scenario blueprint uses the azure voice model and the freepik-classic image model,
but you can change to use flux-pro or elevenlabs.
Be aware that using Flux-Pro or ElevenLabs will consume credits from your JSON2Video account. Read below.
How many credits does this text to video app consume?
By default, the scenario blueprint uses the azure voice model and the freepik-classic image model.
These models are included in the JSON2Video API plan and do not consume extra credits from your account.
Therefore, this app will consume as many credits as the number of seconds of the generated videos. For example, a video of 38 seconds will consume 38 credits.
However, if you use Flux-Pro or ElevenLabs, you will be charged for the credits used by these services. Read more about the credits consumption here: How credits are consumed.
Solving issues
There are some common errors that may happen when generating videos with this tutorial.
- One or more images are blocked because they are considered NSFW: This is a common error when using Flux-Pro even with very innocent prompts. The image model is not able to generate images that are considered NSFW, so you need try again hoping that ChatGPT will generate a better prompt. The ChatGPT prompt includes instructions to avoid NSFW images, but sometimes it may fail.
Published on January 12th, 2025
